
One thing I have come to love about puppet building is the ease in which you can fix or update most puppets. In the beginning, I built puppets by sewing as well as using a generous amount of hot glue. My early puppets had head and arms with a body 'sleeve' that the arms were glued to. When I learned a simple, foam body to add to my puppets for better form, I used a hair dryer to melt the glue to remove the arms. The body sleeve became a neck sleeve that went into the new body and the arms were fixed with doll joint to the new foam body. Most parts can be re-used if they are still in good shape. I also learned to either Velcro or safety pin the neck sleeve to the bottom inside the body. If a head needs to be re-built or replaced, the old one just detaches and slides right out. No need to rebuild an entirely new puppet.
I also started my puppet building with hands that were stuffed with poly-fill and used a very primitive technique to insert removable arm rods. When I learned a better method to create puppet fingers that were posable and a technique for permanent arms rods, I could easily unstitch the hands, replace the appropriate pieces and sew them back shut. Similarly, with mouth-plates, if they needed a repair or a better grip, you can cut along the back of the puppet hairline with about 1/8th - 1/4 inch fabric from the edge of the hair to sew back together after you access the repair area. This fix is virtually unseen when done properly.
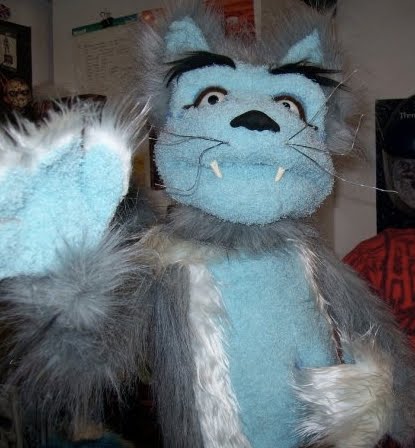
I built this puppet Harvey Furstein back in May of 2009 in a puppet building workshop. I only wanted a basic black pupil and the building method taught was simple yet, with the goal of getting the best results. The hands were just two pieces of fabric glued together with the wire sandwiched in between for posable fingers and the arm rods. The whole hand was then hot-glued to the end of the arms at the 'wrists'. The eyes were also 'lined' with a pipe cleaner. This original incarnation had larger fangs which were replaced soon after the build with smaller ones. Just last month, I decided to update the guy. The eyes were done first by removing the glued-on pipe cleaner and painting over the pupil and eye with acrylic paint. I've been happy with the results of the craft eyes and used those instead with a better placement of the pupil. The eye-lining was replaced with a strip of craft foam. I used the hair dryer again to remove the hands and had extra of the original fabric to build 3-dimensional hands and new arm rods. Any of the old arm fabric that was gunked up with glue at the end, was simply cut away. Harvey looks better than ever now with his bright blue eyes and pro-looking hands.

I made a little blue monster and he was only the 2nd puppet I ever built. He was my first try at the Project Puppet Glorified Sock Puppet pattern. I didn't even take pictures of his original form because I felt he was just a trial 'flop'. The ping pong eyes were glued to the top of his head with flat, black pupils that never had any real personality or focus because the eyes would shift atop the flimsy head. Recently, I decided to at least give him the 3-D craft eyes. When drilling holes in the balls, the dremel slipped and gorged a nice line into one of them. That was it, time to get the hair-dryer to remove the ping pongs. When considering a larger dome eye, I thought I should firm up the head with a foam skull modeled after the top half of the head pattern for the puppet itself. With a firmer 'skull', the posts of the new dome eyes were secured inside and the eyes now have great personality and focus. Another successful, easy fix.
